First thing you need to decide on: to upgrade your setup to DAPS (DOLBY ATMOS PRODUCTION SUITE) or DAMS (DOLBY ATMOS MASTERING SUITE) with a RMW(Rendering and Mastering Workstation). The biggest difference is that DAP works only on a single system workflow. In this case the Dolby Atmos Renderer works on the same Mac as your DAW. DAPS is a Mac Only application. DAMS is a multi-system based workflow. The Dolby Atmos Renderer and your DAWs are on separate computers, this gives you more CPU power to edit/mix freely in your DAWs and render in real time without compromising.
In this article, we’ll focus on DAPS setup. If you want to learn more about DAMS setup, please go to the next article.
For more information about DAPS and DAMS, please visit
https://professional.dolby.com/product/dolby-atmos-content-creation/dolby-atmos-renderer/
WHAT DO YOU NEED TO SETUP DOLBY ATMOS PRODUCTION SUITE?
Software and Requirements
-
DOLBY ATMOS PRODUCTION SUITE (click for a 90-day free trial or purchase)
-
Mac OS 10.13.6 to 10.15.7
-
DAW (Digital Audio Workstation)
-
Pro Tools Ultimate Software 12.8 or later
-
Steinberg Nuendo v8, v10, or v11
-
Speakers
Based on the guidelines Dolby has provided, the minimal speaker configuration for a professional music production environment is 7.1.4. Ideal setup is 9.1.n. A pair of headphones is a good tool for checking atmos mixes, since the majority of consumers are experiencing spatial audio with their earbuds or headphones. If you use Headphones as your monitor, remember to change the Headphones Settings in Renderer to “Binaural”
Tuning
In order to translate your mixes everywhere across all platforms and environments. There are certain specifications for tuning the room/speakers.
IO Routings
-
Audio Interface can support minimal 12-channel of outputs
-
Monitor Controller has enough inputs and outputs and it can individually control/solo/mute each speaker.
Eg. Focusrite Pro’s RedNet series Audio Interface and R1 Monitor Controller
DAW setup
-
Pro Tools Ultimate
In this article, we’ll go over the quick start setup for Pro Tools. This setup uses Dolby Audio Bridge instead of Dolby Send/Return Plugins.
Step by Step setup for Pro Tools users
-
Start with Dolby Atmos Renderer Software, and bring up the software preferences window (shortcut ⌘,) to setup Driver.
Settings: (For your reference)
Audio driver>Core Audio
Audio input device>Dolby Audio Bridge
Audio output device>your Audio Interface
External sync source>LTC over audio
LTC input channel>129
Frame rate> Follow the frame rate of videos if there’s any pictures to sync to
Sample rate>48KHz
(As shown in Pic 1.)
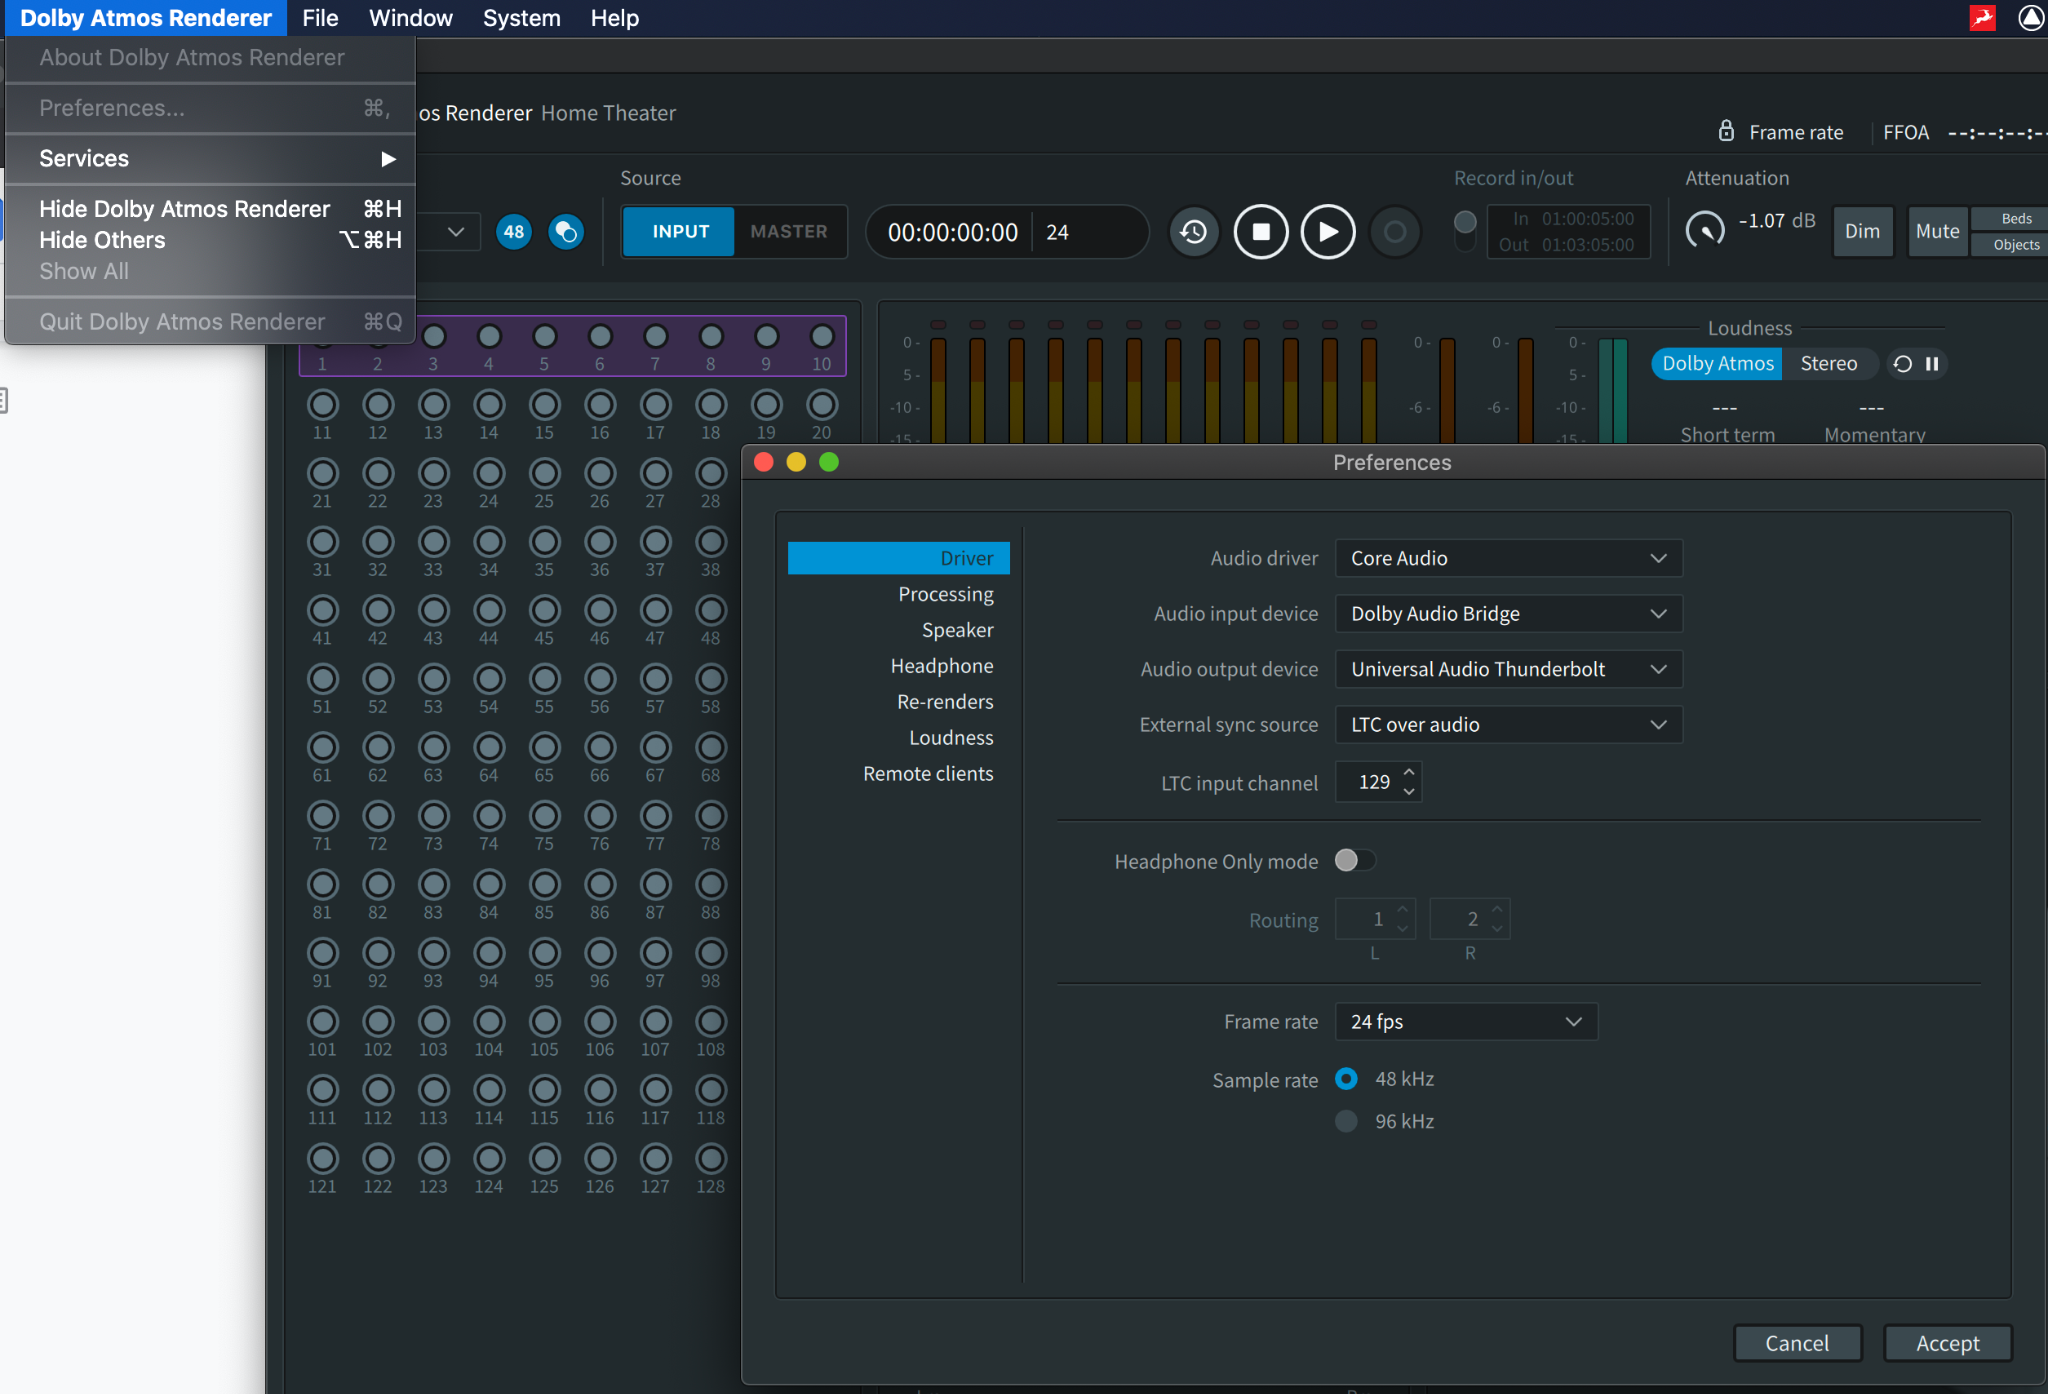
Pic 1.
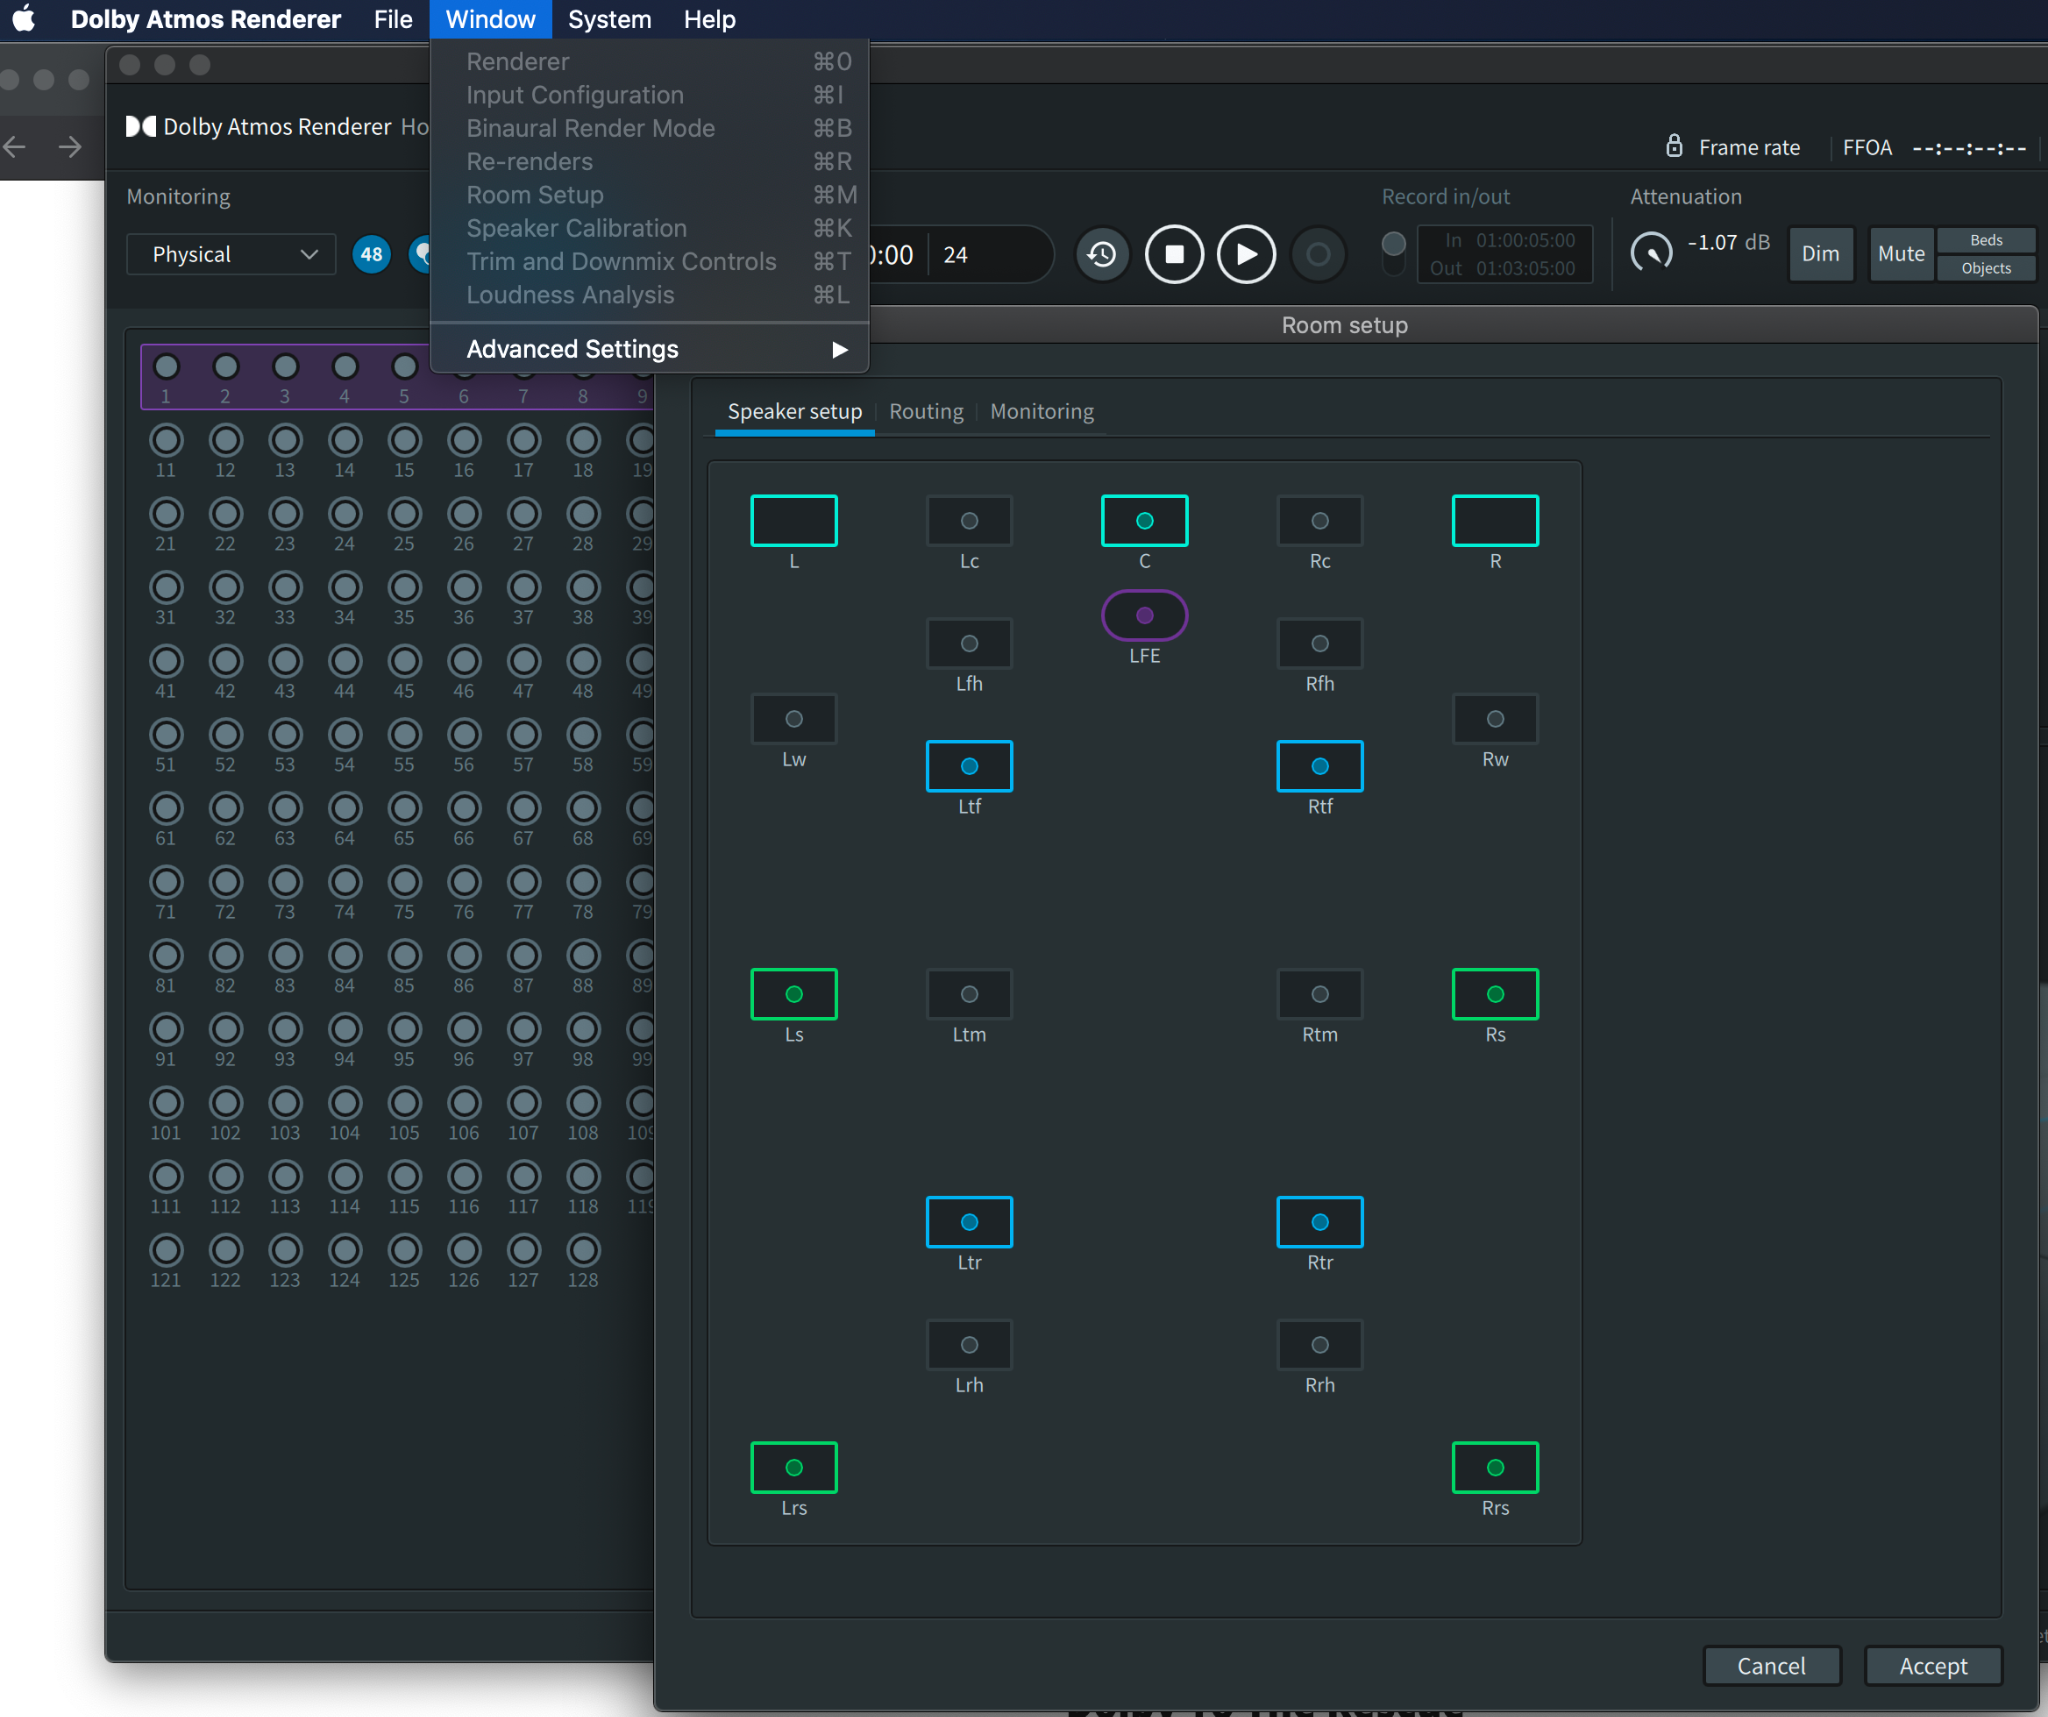
2. Now go to top menu and select Window > Room Setup (shortcut ⌘M), Under the “Speaker Setup” tab, click on the speakers icons correlate to your speaker setup to make sure the routing, IO settings and monitors configurations are correct.
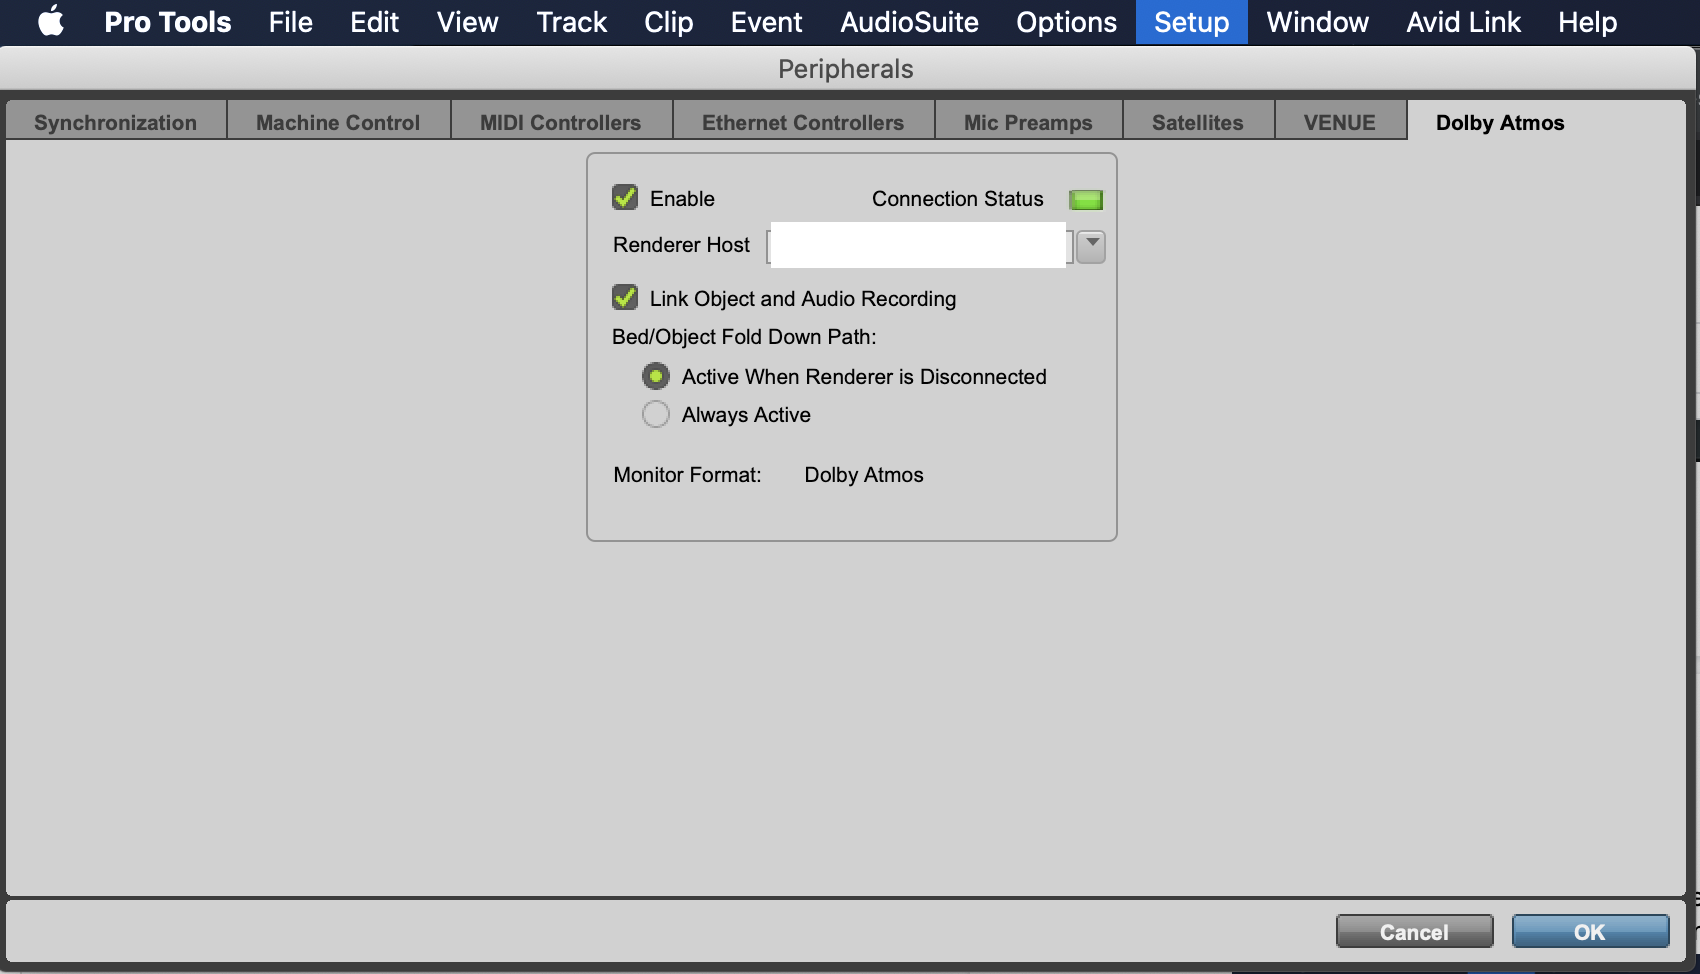
3.Next step – Open pro tools
Go to Setup>Peripherals>Dolby Atmos (This tab only shows in Pro Tools Ultimate)
Enable and select the right Renderer Host. Connection Status will be solid green if all the setup is properly configured, it indicates that Dolby Atmos Renderer and Pro Tools have established communication.
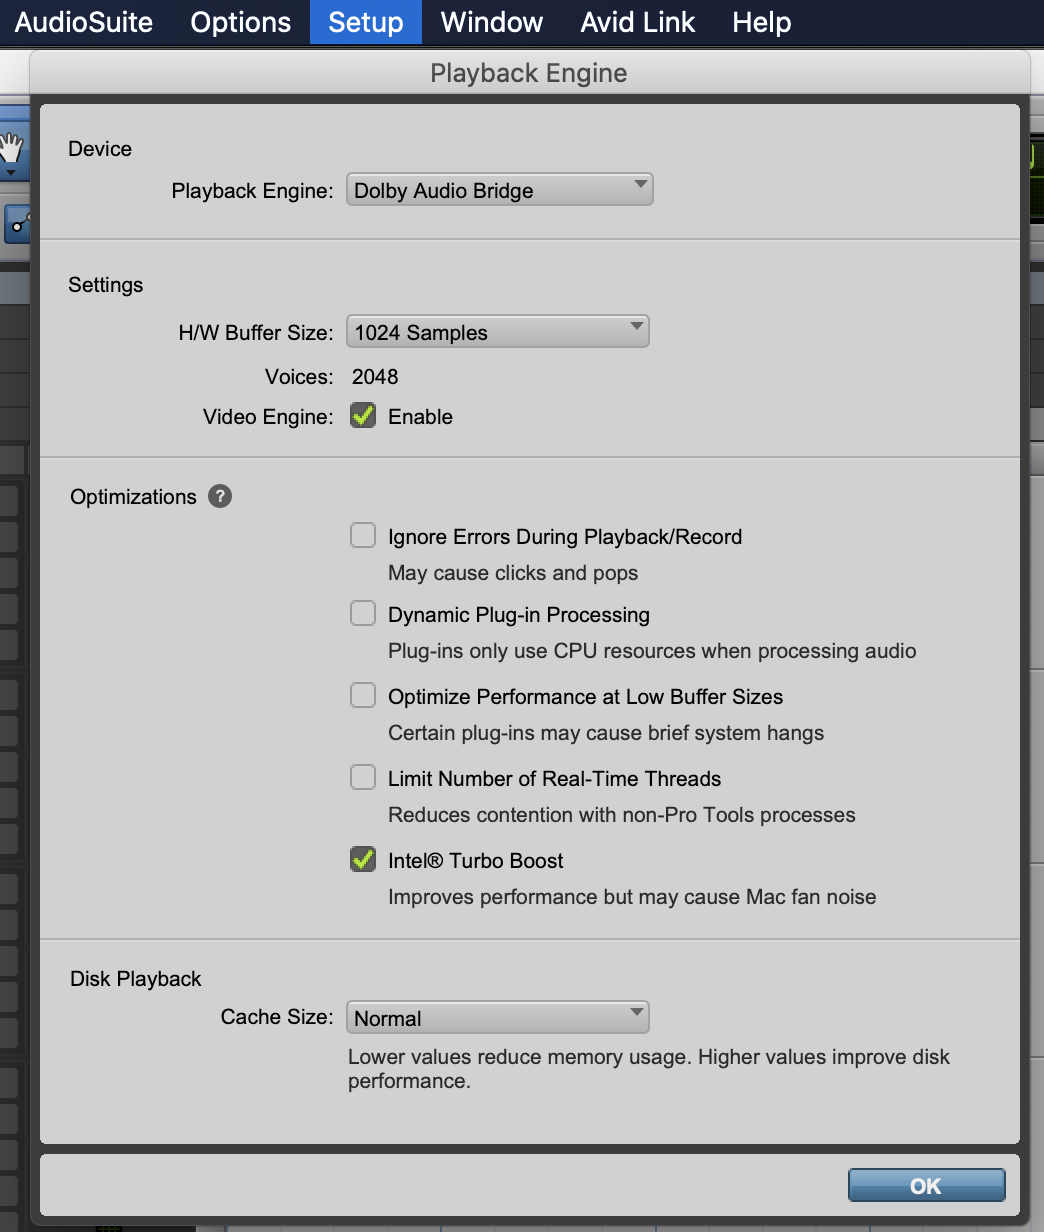
4. Pro Tools Playback Engine
Go to Setup>Playback Engine> Dolby Audio Bridge
5. Pro Tools IO Setup and New Session
When just getting started, it’s good to use one of the session templates from Dolby Atmos Production Suite. After installing the software, the templates will show up in the session template group in pro tools.
Create a new session in pro tools (⌘N), select Create From Template, choose Dolby Atmos Music under Template Group, change I/O Settings to Dolby Atmos Renderer Dolby Audio Bridge Stereo.

Now you have everything setup, ready to have some fun with Dolby Atmos.
References: https://learning.dolby.com/hc/en-us/sections/4406037447828-Dolby-Atmos-Music-Training